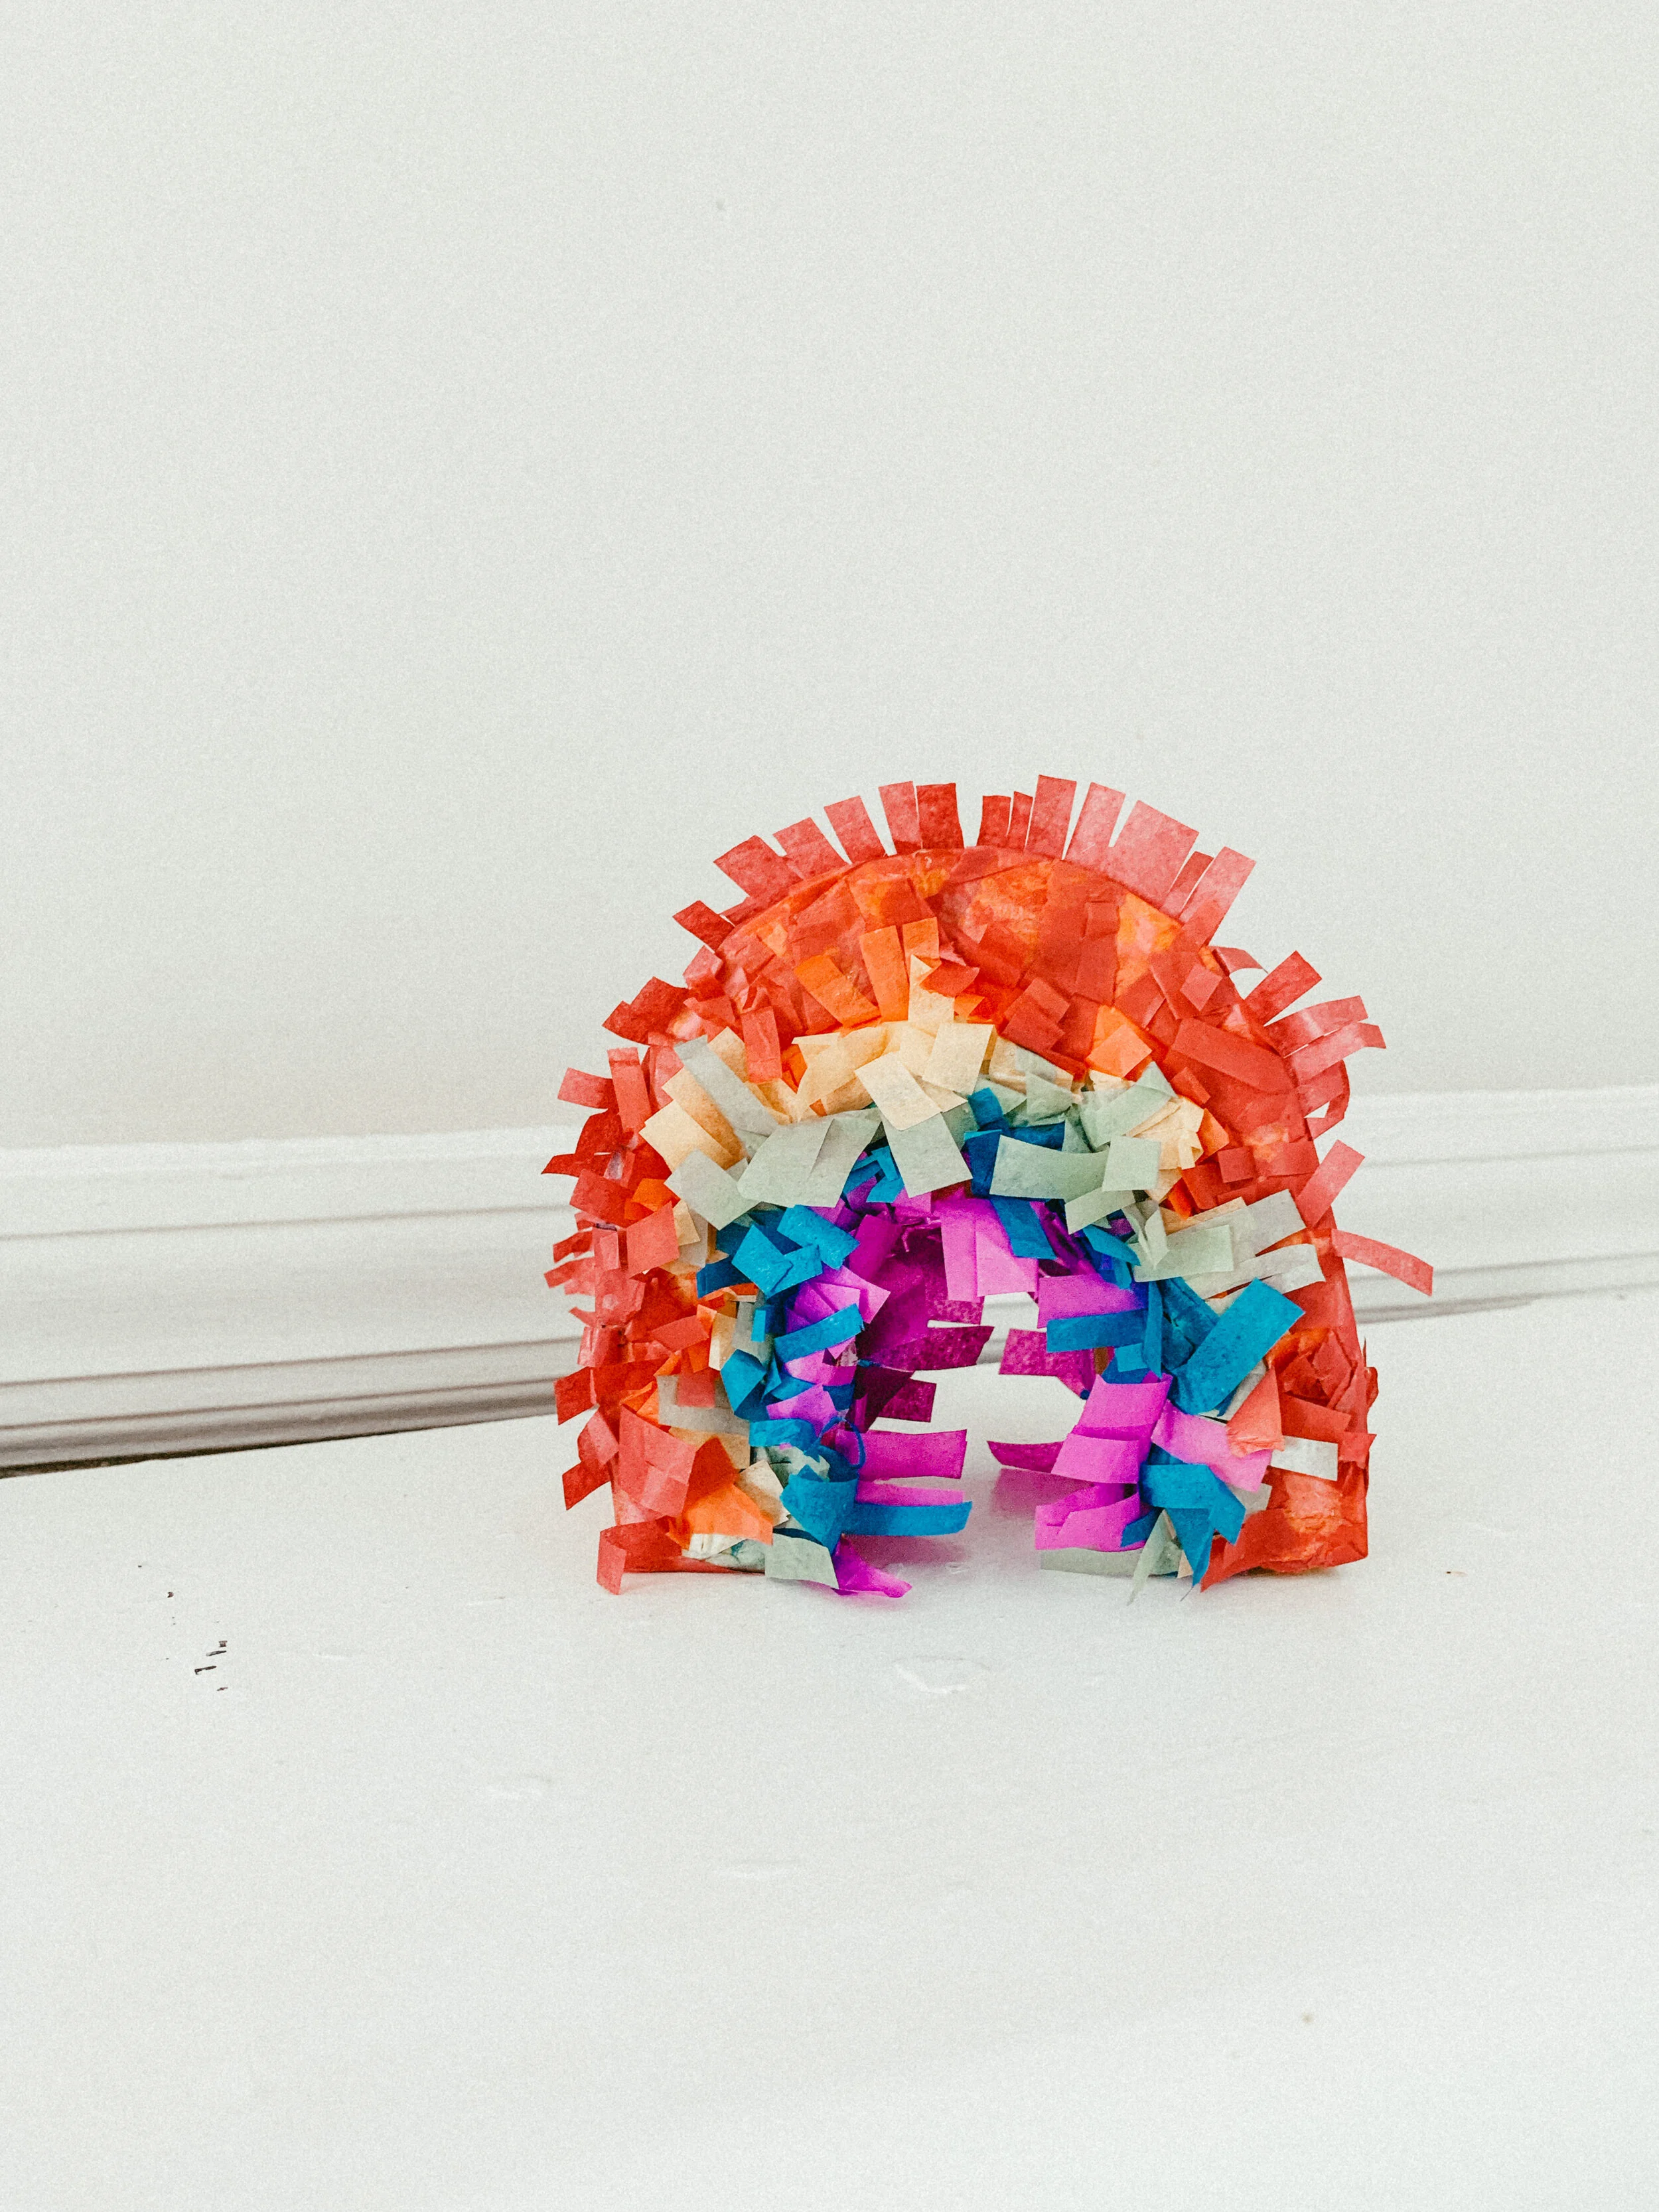
DIY MINI RAINBOW PIÑATA
I love piñata’s a lot. I have wanted to make one for quite some time. Every year for my birthday I always try to get one just because they look so fun! A few years back I remember I was in Michael’s and in the seasonal section there was a kit to make your own piñata. I loved this idea but for some reason I did not buy it and when I went back to get it it was gone! I have been thinking about since that day, which was like 2 years ago so I finally decided to make it and I am so glad I did! I have never made one before and it was sooo incredibly simple! It took probably about a half hour to complete from start to finish! I used pretty basic materials that can be found at home so it is the perfect craft to do while working from home!

Supplies:
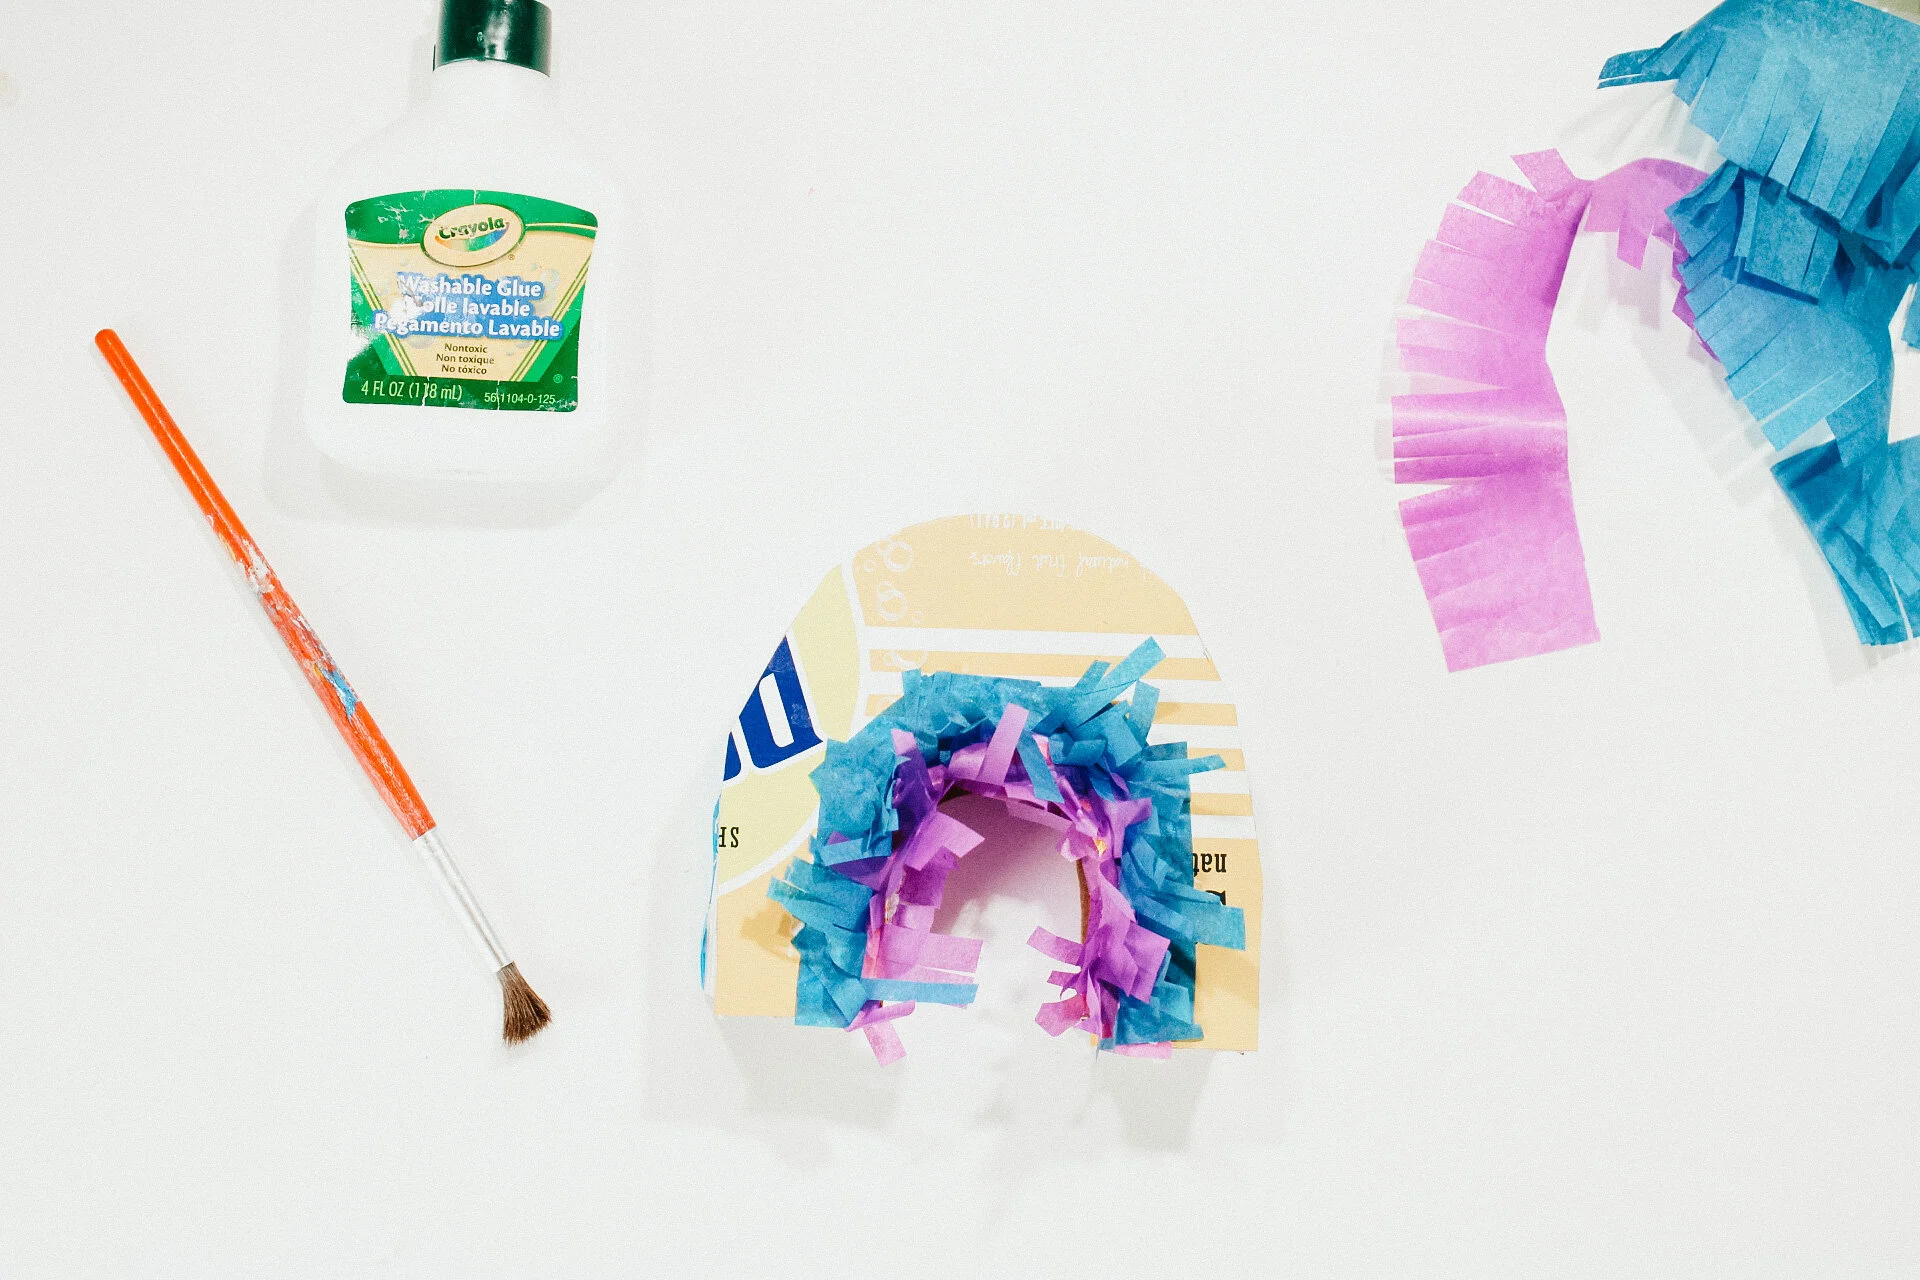
Cardboard (I used a seltzer can box)
Tissue Paper
Hot Glue Gun
White Glue
Step One: FIrst cut your cardboard into a rainbow shape. Cut two of them for the front and back. I layered the pieces to cut the center out that way it was in the same place. Also, cut a 1in thick piece of cardboard that will be the edge of the piñata.

Step Two: Cut the tissue paper into 1in strips and cut the fringe down the side about half the way up. I cut long strips of paper and then cut them into smaller pieces to easier manage.
Step Three: Using hot glue, glue the strip of cardboard to one of the rainbow sides, leaving a flap at the bottom open for candy! Then glue on the back of the rainbow. This will close up the piñata. If there are any gaps use tape to close the gaps.

Step Four: Cover the rainbow with colors Start by lining the bottom with the purple tissue paper. Using a paint brush, paint a thin layer of white glue onto the cardboard and stick the tissue paper to to. Fluff up the frings to see where the next color goes. Work your way up to the top of the rainbow and each fringe should cover a bit of the fringe above.


Step Five: When you get to the top with the red fringe, continue over the arch of the rainbow with the red tissue paper and continue adding fringe to the back to the rainbow.

Step Six: When the piñata is all covered up, fill it with candy and enjoy! I was excited to add colorful tootsie rolls! It was like a rainbow in a rainbow!


There you have it! Enjoy making this fun piñata while you are at home this week. It is also a perfect craft to do this week with your kiddos. You can pre make the cardboard and have them cover with tissue paper, so fun!!! I am also looking forward to one day making a big pinata and seeing what it is like. XOXO